The Clerk
The Clerk is a browser-based utility for updating Atrium's firmware, modifying its settings, and loading & saving patches! It works on any Chromium browser (eg. Chrome, Edge, Brave, Opera, etc).

Visit the Clerk at https://atrium.whimsicalraps.com/clerk
The Clerk hosts its own documentation on its dedicated site, so we won't repeat that here, but perhaps its helpful to note that we can use it to manage:
- spectre's filtering
- touchplate sensitivity
- lighting brightness
- loading & saving patches
- firmware updates
Offline Access
The Clerk is a humble worker, operating as a static website served from a single folder on our server. Besides fetching the latest firmware on-demand, it has absolutely no dependencies or dynamic content; this means we can simply save the website in full and use it as an offline utility.
Simply load the Clerk in your Chromium browser (while online) and Save Page As..., which will download two files to your chosen location: Clerk.html and a Clerk_files folder. Just keep them both in the same location and open Clerk.html whenever you need offline access to its functionality.
It's good practice to refresh your downloaded Clerk files whenever there's a new Atrium update, as features for both tend to release simultaneously.
If you save a firmware's .dfu file from Atrium's firmware repository, you can also use Clerk to update while offline using its Update from File workflow.
Atrium: System Modes
Atrium (running v1.2.0 or later) has three system modes:
runtime: this is the main Atrium instrumentloader: this is v1.2.0+ bootloader, which allows you to perform updatessystem DFU: the original bootloader, still accessible to allow updates to theloaderin the future
Once v1.2.0+ is installed, Clerk takes care of switching from runtime to loader when you begin the update process, but if you need to manually access the loader, hold tap and gesture while powering up Atrium.
Some notes on usability:
- In Clerk, the
loaderwill appear as "Atrium Bootloader" instead of "DFU in FS Mode". Updates via theloaderare substantially faster than from thesystem DFU. - The first light in the gesture lightstrip will pulse indicating it is ready to update.
- When an update begins, the gesture lightstrip will fill with dim blocks (firmware is being erased), then a bright light will fill it from left to right (firmware is being written). On completion, Atrium will return to the
runtime. - See which version Atrium is on without a computer by reading the numbers in the phase window.
- To exit the
loaderwithout updating and return toruntime, press load + clear. - The
loaderwill play a small composition while updating, with the volume knob functioning as normal.
If you need to access to system DFU, you can jump there from the loader by holding clear for 3 seconds. The phase meter will count you down from 3, and you will see the letters dFU across the light windows. You can then use Clerk to update the loader as well as the runtime.
Troubleshooting
MacOS
If Atrium is not successfully populating as a device once you've clicked Clerk's connect button, ensure that you have allowed Atrium to connect to your Mac via the system pop-up:
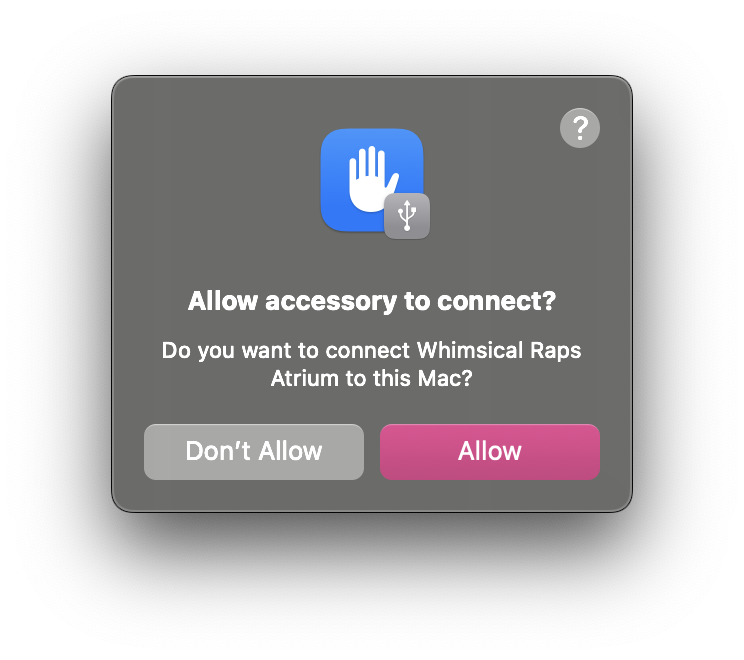
If Atrium is not successfully populating as a DFU device once you've clicked Update to Latest or Update from File, it's likely because MacOS has denied Atrium's DFU mode from registering as an 'allowed' device. Ensure that you have additionally allowed Atrium to connect to your Mac via the second system pop-up:

Once you Allow the device, you will need to click Update to Latest again to actually select it (DFU in FS Mode) from the pop-up.
If at any point you accidentally pressed Don't Allow, simply reconnect Atrium via USB and MacOS should prompt for your approval again.
Windows
v1.2.0+ / loader mode
If you're updating from v1.2.0, Clerk will automatically place Atrium into loader mode after you click Update to Latest or Update from File. If you do not see Atrium Bootloader in your browser's popup window, it's likely because Windows does not already have a generic WinUSB driver installed for Atrium's loader mode. In this case, manual assignment is necessary:
- Download Zadig and run the program
- If Atrium is not yet in
loadermode, then please connect to it via Clerk and clickUpdate to Latest(orUpdate, if updating from a file) to put it intoloadermode- You can also hold Atrium's black
gesturekey andtapwhile powering to enterloadermode
- You can also hold Atrium's black
- Once Atrium is in
loadermode, it should populate in Zadig's Device dropdown asAtrium Bootloader- Don't see it? Click
Options > List All Devices - DO NOT select any other devices which are not
Atrium Bootloader
- Don't see it? Click
- With the
Atrium Bootloaderdevice selected in Zadig, ensure that the destination driver isWinUSB (v6.1.7600.16385) - Once the above is verified, click the
Install Driverbutton in Zadig:

- Zadig will now install the driver, which may take some time. When it's completed, it will alert you that "The driver was installed successfully" and you'll see that the
WinUSBdriver was assigned to theAtrium Bootloaderdevice:

- Back at the Clerk, click
Update from latest(orUpdate, if updating from a file) again and you should be able to select theAtrium Bootloaderdevice from the pop-up- It might also populate as
Atrium Bootloader - Paired
- It might also populate as
- Once the update is complete, feel free to close Zadig – you should not follow this workflow for future updates, as your Windows machine now has a driver assigned to Atrium's
loadermode!
pre-v1.2.0 / system DFU mode
If you're updating an Atrium that does not already have v1.2.0+ installed, or you are updating a v1.2.0+ Atrium using the system DFU mode for the first time, you will need to manually assign a generic WinUSB driver installed for Atrium's DFU mode:
- Download Zadig and run the program
- If Atrium is not yet in DFU mode:
- pre-v1.2.0: connect to Atrium via Clerk and click
Update to Latest(orUpdate, if updating from a file) to put it intosystem DFUmode - v1.2.0+: connect to Atrium via Clerk and click
Update to Latest(orUpdate, if updating from a file) to put it intoloadermode, then holdclearfor three seconds to entersystem DFUmode
- pre-v1.2.0: connect to Atrium via Clerk and click
- Once Atrium is in DFU mode, it should populate in Zadig's Device dropdown as
DFU in FS Mode- Don't see it? Click
Options > List All Devices - DO NOT select any other devices which are not
DFU in FS Mode
- Don't see it? Click
- With the
DFU in FS Modedevice selected in Zadig, ensure that the destination driver isWinUSB (v6.1.7600.16385) - Once the above is verified, click the
Install Driverbutton in Zadig:

- Zadig will now install the driver, which may take some time. When it's completed, it will alert you that "The driver was installed successfully" and you'll see that the
WinUSBdriver was assigned to the DFU device:

- Back at the Clerk, refresh the page and go through the update steps again and you should be able to select the
DFU in FS Modedevice from the pop-up- It might also populate as
DFU in FS Mode - Paired
- It might also populate as
- Once the update is complete, feel free to close Zadig. You have successfully assigned a driver to Atrium's
system DFUmode, but note that you will likely need to follow the v1.2.0+ /loadermode steps listed above when you update next time.
Linux
If Atrium is not appearing as a DFU device once you've clicked Update to Latest or Update from File, it's likely because of a security issue which requires adjusting udev rules.
In your terminal of choice, create a udev rules file for Atrium, and open it for editing, by executing:
sudo nano /etc/udev/rules.d/49-atrium.rules
Into it, write:
SUBSYSTEMS=="usb", ATTRS{idVendor}=="cafe", ATTRS{idProduct}=="df11", MODE:="0666"
Exit and save (Control + X, then Y). Reload the udev rules by executing:
sudo udevadm control --reload-rules
sudo udevadm trigger
Physically reconnect Atrium and you should now be able to connect in Clerk.
Update Failure
If a firmware update fails and the extension window displays "f" (for "fail"):
- Keep Atrium connected to your computer, as it has automatically forced itself back into the
loader!- If you disconnected Atrium already, that's okay too! Hold tap and gesture while powering up Atrium to enter the
loader.
- If you disconnected Atrium already, that's okay too! Hold tap and gesture while powering up Atrium to enter the
- Since Atrium is now in
loader, the initialconnectbutton workflow is not needed – simply skip ahead to theFirmware Updatetab and select eitherUpdate to Latestor, if you have a firmware file downloaded,Update from File. - You can now simply retry the firmware update, making sure your cable connection is solid & that you keep Clerk's window in view throughout the update.
If a firmware update fails and Atrium only displays a white/blueish light in the little window embedded along the left edge:
- Wait a minute or two, as Atrium might simply be recalibrating its oscillators – monitor Atrium's audio outputs to confirm. Atrium will return to normal operation after it finishes.
- If Atrium is not calibrating or does not return to normal operation, disconnect Atrium from power.
- Hold tap and gesture while powering up Atrium to enter the
loader. - Since Atrium is now in
loader, the initialconnectbutton workflow is not needed – simply skip ahead to theFirmware Updatetab and select eitherUpdate to Latestor, if you have a firmware file downloaded,Update from File. - You can now simply retry the firmware update, making sure your cable connection is solid & that you keep Clerk's window in view throughout the update.
Info
If neither of these cases resolves or describes your trouble, note the colour of the debug light (embedded along the left edge of Atrium) and send a message to support@whimsicalraps.com with as much detail as possible. eg. Which OS is your computer is on? Which browser & what build? Did you "Update to Latest" or "Update from File"? Any other details you can imagine. More info the better!
Firmware Changelog
Though this is a Players' Manual and not an Operator's Handbook, it does seem useful to capture a summary of Atrium's version-to-version changes.
v1.2.1 → v1.3.2
v1.3.x is largely focused on all things clock – beat-synced timing parameters, allowing modulators to be mapped to tap-tempo, and generally improving the stability of clocking system-wide.
new
clock
- Timing parameters can now be synced to Atrium's clock. See 'Sync' Mode for more info!
- Modulators can be mapped to tap-tempo, including external control voltage. See Modulated tap-tempo for more info!
- gestures can be quickly quantized using the Gesture Syncing Shortcut.
- When Atrium is running on its internal clock without tap-tempo:
- clear + tap resets the phase of the clock & sends a MIDI Start message to any followers
- turning tempo full CCW stops the clock and sends a MIDI Stop message to any followers
- turning tempo CW from 'stopped' sends a MIDI Start message to any followers
improved
clock
- Better MIDI clock sync, in & out.
contours
- Looping contours complete their cycles when sustain is zeroed or strum is released.
- Looping contours restart their cycles (either re-entering the attack phase or starting a new envelope) when sustain is quickly raised or strum is engaged.
fixed
general
- Fixed sound engine crash when receiving super-high MIDI notes while octave is at maximum.
- Removed strum touchplate timeout, which allows contours to be sustained with touch for as long as you want.
- spectrum's baseline sensitivity has been increased to feel more consistent with the other touch panels.
Patch v1.3.1: FIX when selecting MIDI clock input, Atrium's clock wouldn't start until a MIDI 'start' message was received. Now clock auto-starts to follow devices that don't send MIDI transport controls.
Patch v1.3.2: FIX when Atrium was saving, and also receiving MIDI Clock faster than 40bpm, the clock input would stop working. With very high tempos, the system would crash – no longer!
v1.1 → v.1.2.1
v1.2.0 is focused on making the update process of Atrium more resilient, along with some niceties like faster boot times, and kind lighting fades. A fix to the controller port (USB Host) is included too.
v1.2.1 is focused on improving incoming MIDI connectivity and stability.
new
general
- Lights fade in gently upon power-up (previous behavior: abrupt pulse, then all-bright)
fixed
USB Host
- Driver is now fully asynchronous, so there's no light stutter when connecting a device to the
controllerport
(v1.2.1) MIDI
TRS MIDI:
- Multiple issues causing stuck notes are resolved
- Added support for Roland UM-ONE mk2 (as well as other legacy DIN MIDI devices)
USB MIDI (controller):
- Issues causing stuck notes upon connection are resolved
- MIDI clock can now be sent to the connected controller
- Added support for OP-1 and OP-1F (as well as others with similar USB descriptor issues)
- Added support for Melbourne Instruments Roto-Control to be recognized as a MIDI controller (as well as others that expose additional CDC ports)
USB MIDI (computer):
- Sending MIDI clock from Atrium to a Windows PC now works correctly
v1.0 → v.1.1
new
- The Clerk: A one-stop shop for firmware updates, settings modifications, and patch saving & loading.
- spectre filtering: The presence of time artifacts in the analog bucket brigade device signal chain has been softened. Two flavors:
normal(this is the filter-adjusted configuration, which is the new default) andgrit(the original v1.0 settings, with some time whine). - controllable lighting brightness: Either reducing intensity (
dim) or adding more contrast (bright). - controllable touch sensitivity: Three modes of responsiveness:
normal,sensitive, andhyper.
improved
general
- the recently-recalled cluster will pulse while holding chord
- better lighting information consistency
- UI generally runs at higher refresh rates
MIDI
- clear learned MIDI destinations
- map MIDI CC’s to touchplates: voicing, phase, spectrum, and stretch
- MIDI sustain pedal CC 64 now implemented to sustain voices
- MIDI learn now uses the gesture LED strip to display the current CC value
clear+midiclears all MIDI notes (on-board "panic")
spectre
- time has been reshaped to provide higher accuracy at fast times
fixed
general
load+clearnow more resilient and no longer requires double-execution to leave high-intensity patches- loading saved patches is now more reliable
- clock:
clear+tempoclears tap-tempo - scale editor: longer sequences accurately displayed and stepped-through
gestures
- gestures now follow changes to tempo
- when recording a gesture, starting another gesture recorder will now stop the previous (and start its playback) for fast overdub-style workflows with multiple recorders
- step now quantizes to clock pulses, creating more of a sample+hold effect
- recording long gestures no longer slow down runtime
MIDI
- Atrium maps incoming note velocity more smoothly
- clock out via TRS MIDI now working
- MIDI "panic" (CC 123): all notes off
- MIDI learn settings now saved in patches
- MIDI SysEx messages are correctly ignored (could cause bogus notes previously)
- when MIDI devices are connected to the controller (USB-A) port, latency is dramatically improved, and no longer slows down the core modulation loop
- USB devices that enumerate a serial port along with MIDI now expose the MIDI signals (eg. monome iii grids and arcs)
- MIDI support for Elektron Digitone and Digitakt Mk1 connected to
controllerport